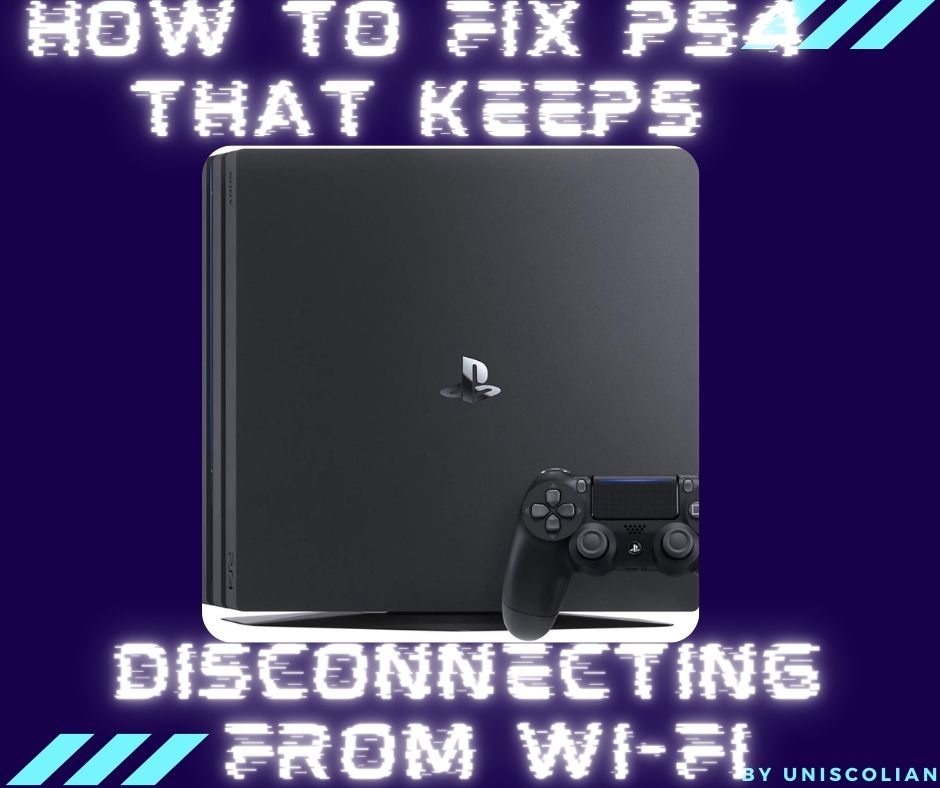
It’s no secret that the PlayStation 4, like other consoles, has been plagued with connection issues. The PlayStation 4 is equipped with a feature that allows you to connect your console to the internet via Wi-Fi, and it’s not uncommon for these connections to drop unexpectedly. This article will explore some quick fixes that may help resolve this issue permanently.
Check your router for any interference or other devices that may be affecting the signal for fixing PS4 Wi-Fi disconnection
Check your router for any interference or other devices that may be affecting the signal. It is advisable to check for possible interferences within your wireless range. This will help you isolate and identify possible causes of your PS4 Wi-Fi disconnection issues.
Check if there are any radio transmitters, microwave ovens, or cordless phones that could be causing interference. You can do this by moving your PS4 to different locations and checking if it is still experiencing the same issue. If there are, then you will need to move those devices away from your PS4 or turn them off until you have fixed your problem.
Check for possible sources of interference within your wireless range and select a channel that is least likely to be crowded. Move your PS4 further away from the possible sources of interference if you still need to use a channel that has more channels being used near it.
Check for any other wireless devices in your home that may also be interfering with your PS4’s Wi-Fi connection. Doing so will help identify possible causes of your PS4 Wi-Fi disconnection issues. You can do this by checking to see if any devices are using the same channel as your PS4 and switching channels for all devices in the house so they will not interfere with it.
Check to see if there are any loose cables or damaged ports for fixing the PS4 Wi-Fi disconnection issue
Some people have been talking about the loose cables and damaged ports issue for fixing the PS4 Wi-Fi disconnection problem, please make sure that there are no loose connections between your PS4 console and router or modem.
First, make sure that there are no loose cable connections between your PS4, router, or modem. These are some of the ways you can check whether the cables for an internet connection to your PS4 console have any loose connection:
With a LAN cable, connect your PlayStation 4 directly to the modem and see if it works properly.
Using a different LAN cable, connect your PlayStation 4 directly to the modem and see if it works properly.
If both of them using a LAN cable don’t work in connecting to the internet, you have to buy a new one, or try another Ethernet port on your router. Make sure there are no damaged ports for fixing PS4 Wi-Fi disconnect Please be noted that the only way to repair these parts is to contact a certified technician who can repair your devices according to the manufacturer’s warranty.
Related Article: How to Connect Power Supply Cables: Guide To Wiring A PSU To The Motherboard
Manually Select a Frequency Band for fixing the PS4 Wi-Fi disconnection issue
The PS4 has an issue that causes the Wi-Fi to suddenly disconnect. This happens when the PS4 is placed too close to certain electronic devices such as a microwave oven or a wireless access point (WAP) operating on the 2.5 or 5 GHz frequency band.
This problem can be solved by manually selecting one of the other available frequency bands. However, as the PS4 doesn’t provide a means to do so directly, this issue needed to be resolved by making use of some workarounds.
One of these is using an external router that does not broadcast wireless devices on a 2.5 or 5 GHz frequency band and only broadcasts at other frequencies or provides its Wi-Fi network by means of Ethernet cable.
Another potential workaround is to make use of an external Wi-Fi adapter/dongle that has a switch or button that can be used to change between different frequency bands on the fly and then plug it into one of the USB ports of the PS4.
This method of selecting a different Wi-Fi frequency band for the PS4 was initially discovered and posted on a Chinese video game forum by user asdasd1234. As it is not an official solution, some tinkering may be required to get this method working, but most of these steps are shown in the original post and described below:
1. Connect any Wi-Fi-enabled device, such as a smartphone or tablet, to the Wi-Fi network provided by the PS4 using an Ethernet cable.
2. Go to [Settings] > [Network] > [Set Up Internet Connection]. Select the connection method to use when setting up the internet connection; either from a broadband (LAN) or wireless (Wi-Fi) connection. Use the Wi-Fi connection method to connect directly to the PS4 via Wi-Fi.
3. Select [Easy] for the internet connection setup type or use one of the other options such as [Custom]. For details about this, refer to these links: How To Set Up a Wired Internet Connection on PS4 and How To Set Up a Wireless Internet Connection on PS4.
4. When prompted to choose between the 2.5 and 5 GHz frequency band, select [2.5 GHz] as the Wi-Fi frequency band of your PS4 system for fixing the Wi-Fi disconnection issues related to microwave ovens and other devices that operates at the 2.5 GHz frequency band.
Alternatively, select [5 GHZ] for fixing the Wi-Fi disconnection issues related to devices that operate at the 5 GHz frequency band.
5. Follow onscreen instructions to complete the installation and set up of your PS4 system’s internet connection over the Wi-Fi network you have selected above.
6. For this workaround to work, the PS4 must be connected to the Internet via Wi-Fi. Any other connection methods such as Ethernet are not supported at this point in time and may interfere with this workaround by limiting your options for selecting a Wi-Fi frequency band for the PS4 system. If you have an option of setting up your system’s internet connection over Wi-Fi or Ethernet, use the Wi-Fi connection method.
7. When you are done setting up and using your PS4 system over the internet, unplug the USB Wi-Fi adapter/dongle from one of its USB ports and then either turn off or disconnect from a power source any Wi-Fi enabled device that was connected to the system.
8. Connect the USB Wi-Fi adapter/dongle, which you used in step 7 above, to a different USB port on your PS4 and then go to [Settings] > [Network] > [Set Up Internet Connection]. Select the connection method to use when setting up the internet connection; either from a broadband (LAN) or wireless (Wi-Fi). Use the Wi-Fi connection method to connect directly to the PS4 via Wi-Fi.
Reset the router and PS4 for fixing the PS4 Wi-Fi disconnection issue
Are you still getting the Same Wi-Fi disconnection issue with your PS4 on Wi-fi? Well, there is no need to worry about it as you can easily fix this by just resetting your router. If you are having problems connecting to a network or if your Internet connection seems slow, try these steps.
This works for all the latest Sony PS4 systems like; PS4, PS3, PS Vita, and PlayStation TV.
#1. First of all, check for any lights or other indications on your router to find out whether it is working properly or not. If there is no indication of whether it is working properly or not then you can try resetting your router.
#2. Most modern routers have a way to reboot and turn off the device with a button on the back panel of the router itself, but you’ll still need to log into your router’s settings page at 192.168.1.1 or http://192.168.1.1 and look for a link that says something like “reboot” or “restart”.
#3. After you have rebooted the router, you will be able to access it again within a minute or two. Now if the issue is solved then PS4 should connect to the Internet without any interruption.
#4. However, if your PS4 still refuses to work properly on WiFi, then you can reset your PS4 manually. Follow these steps:
#a) Press and hold the Power button on the front of PlayStation 4 until it beeps twice, which should take about 7 seconds.
#b) Slide the power switch to turn off PS4. Wait a few seconds for the PS4 system to fully power down.
#c) Re-connect the power cable and then turn on your PS4 to try again. If you are still facing the same Wi-Fi disconnection issue, contact Sony’s help & support team for more information.
Update your wireless network card driver software for fixing the PS4 Wi-Fi disconnection issue
Many users have complained about the PS4 Wi-Fi disconnection issue and many of them have tried all sorts of things to fix it, including changing their router settings or updating their firmware.
Here’s something you might not know: The cause behind this problem is your PC’s wireless network card driver software that isn’t compatible with your router’s 2.4Ghz wireless frequency bandwidth.
You might be able to fix your PS4 Wi-Fi disconnection issue just by updating your wireless network card driver software with the one that supports 2.4Ghz frequency bandwidth.
Here’s what you need: 1) Wireless network card (2) Download and install Wireless Network Watcher.
Method 1: Try updating your wireless network card driver software to fix the PS4 Wi-Fi disconnection issue on Windows 10/8.1/8/7 64bit PC
Download and install Wireless Network Watcher on your computer attached to the same 2.4Ghz router as your PS4 console is. It`ll show the wireless network card driver software your PC is using and which one supports 2.4Ghz frequency bandwidth. You should upgrade it to fix your PS4 Wi-Fi disconnection issue. If you don’t have an idea about what driver software version you’re using, just follow these steps: 1) Click Start > Run/search. Type devmgmt.msc , then press Enter key to run Device Manager; 2) Expand Network Adapters section, you`ll find your wireless network card and the driver version of it.
ACCESS UPDATE: Sometimes this method might not work for all drivers, just give it a try. If everything’s fine, you`ll see Wireless Network Watcher detects your wireless network card driver and shows its information like the picture below:
Method 2: Try updating your wireless network card driver software to fix the PS4 Wi-Fi disconnection issue on Windows 64bit PC If you use a wireless network adapter (without an internal wireless network card) in your PC and want to know if it’s compatible with 2.4Ghz frequency bandwidth, you can also try the second method: 1) Download Wireless Network Watcher and install it on your Windows 64bit computer as well; 2) Run it, then click “Advanced View” right top corner of the window, then click “Wireless Adapter Monitor” tab; 3) Click “Scan Now”, it will detect your wireless network card driver software and show its information like the picture above.
If you don’t see any of them, please uninstall the drivers in Device Manager, reboot your computer, and make sure that both WiFi switch and Bluetooth are disabled in BIOS settings.
Related Article: How to Install Extra Fans in a PC Case: Connecting to the Motherboard or PSU
Change your wireless channel on both your console and router for fixing the PS4 Wi-Fi disconnection issue
Now we are going to select the channel which is least occupied in your area or for other words least interference with signal strength.
So how do you change your wireless channel on both your wireless router and PlayStation 4 console together? It’s very simple and easy to do so, let me first show you the steps for changing on PlayStation 4 console:
PlayStation 4 Console Settings
Step 1. Select the top left corner options icon and press X on your PlayStation 4 controller. This will open up the settings menu.
Step 2. Scroll down to select “Settings” and press the X button again for confirmation.
Step 3. Now you should be to see the Settings menu with the “Network” sub-menu displayed. Select the network and press the X button again.
Step 4. Now select PSN as in the screenshot below and press X for confirmation.
Step 5. Next is settings selection, here go down one step by pressing the left arrow button on your PlayStation 4 controller or Left/Right on your keyboard, this will take you to the next setting. Then press X for confirmation.
Step 6. Now you have 2 options here “Use a wired connection” and “Use wireless connection”. Select Wireless Connection by pressing the left arrow button again on your PlayStation 4 controller or Left/Right on your keyboard. Then press X for confirmation.
Step 7. After this select “Set Up Internet Connection” and press X for confirmation.
Step 8. Now here you should a screen like the below, choose your option either “Use Wi-Fi” or “Add a Wireless Network”. Choose what you want by pressing the X button on your PlayStation 4 controller (or left arrow to change the setting and right arrow to go back one step).
Step 9. Now on the screen, choose “Custom” or whatever option you want and press X for confirmation as shown in the below screenshot. Then decide your network name with letters and numbers by pressing left/right arrows or using the keyboard on your computer if connected via a wired cable connection
Step 10. Once you’re done, press X to select your network name and then press X for confirmation.
Step 11. Now the PS4 will ask you to input your wireless key or password, do so by using the keyboard if connected via a wired cable connection or left/right arrows on the keyboard if no physical keyboard is connected. Press enter once done and press X for confirmation.
Step 12. Now the PS4 will show you below the screen, select “Yes” with the X button and press enter again to confirm it, please wait while PS4 automatically inputs the data. Then your PlayStation 4 console is now set up with a wireless connection successfully! You can select No if you don’t want or need internet connecting right now.
Step 13. Now that your PlayStation 4 console is set up with a wireless connection, we can move on to router configuration so don’t worry if you don’t have a wireless internet connection yet but will get one shortly!
Router Configuration Steps:
Login into the router administration panel by typing in default gateway (192.168.0.1 or 192.168.1.1) in the browser and pressing Enter, then input the username and password to login into the router administration panel, if you have not changed your default IP address of the router yet then it’s either admin/admin or admin/user (depends on which one you use).
Step 1 . First and foremost we will need to know your current wireless channel of both the router and PS4, for that you can follow this guide to find out your default wireless channel (note: different brand routers may have a bit different steps here so please refer to manufacturer’s manual if unsure).
Step 2 . Once known, log into the admin panel (192.168.0.1 or 192.168.1.1) and navigate to Wireless -> Advanced Settings tab and find wireless channel (it’s usually Channel 6 by default).
Step 3. Now click Apply/Save on your router admin panel, this will save all the settings you changed as shown below:
Repeat Step 2 – Step 3 on the router admin panel for all the wireless channels (1~11) and then go to the next step.
Step 4. Now repeat Step 2 – Step 3 on your PlayStation 4 console, navigate to Network Settings -> Set Up Internet Connection -> Custom from selection box with X button (or left/right arrow on keyboard), now use arrows or keyboard to select a wireless channel on your PlayStation 4 console, it will be the same number as we set on our router. Press X for confirmation.
Step 5. Now you will get a pop-up message saying that “The Internet Network Channel cannot be changed from within this setting menu” and asks you to configure manually from the network settings of the device, press X for confirmation.
Step 6. Now select IP Settings on your PlayStation 4 console with the X button and press enter, now choose either DHCP (option 1) or Static IP Address (option 2), the latter will be best at least for now. Press X for confirmation.
Step 7. Select the method you want to configure and then press X for confirmation. For the DHCP option, select method manually and then input IP Address (e.g. 192.168.0 or 192.168.1) with keyboard and Subnet Mask (e.g. 255.255), Primary Gateway (e.g 198. 168. 0. 1 ), Secondary Gateway / DNS server (e.g 198 . 168. 1. 10 ) and Preferred DNS Server (Use Google DNS 8 . 8 . 8 . 8) For Static IP option, input your router’s default gateway (192.168.0.1 or 192.168.1.1), Primary Gateway (e.g 198 . 168 . 0 . 1 ), Secondary Gateway / DNS server (e.g 198 . 168 . 1 . 10 ) and Preferred DNS Server (Use Google DNS 8 . 8 . 8 . 8)
Step 8. Press X for confirmation when you are done with IP Settings, now press enter to go back to Network Settings on PlayStation 4 console and press X for confirmation. This will bring you back to the “Connect To The Internet” screen
Step 9. Now press X for a wireless network, then select your router’s name (default gateway) from options with left/right arrows or keyboard. Press X for confirmation. Your PlayStation 4 console should now connect to your wireless network automatically.
Step 10. You should be connected to the internet by now, but you are not done yet! PS4 Update system and software will try to downgrade your router’s channel from 11 (which we have just set up) back to 1
You need to repeat the same steps as in Step 5 – Step 10 for all the wireless channels on both your PS4 console and router (e.g. channel 3, 4, 5, etc.) after every 24 hours for at least a few days until Sony release an update to fix this issue. You should do it even if you are already connected to the internet by now (but not if you are connected to the internet by Ethernet cable or via another wireless network, such as a public hotspot). If you don’t do it for a few days, your PS4 will be stuck on channel 1.
NOTE: Both your router and PlayStation 4 console should be rebooted (turned off and then turned back on) every time after configuration tweak for it to take effect.
Update your PS4’s software for fixing the PS4 Wi-Fi disconnection issue
You may have noticed that the PS4’s Wi-Fi is disconnecting shortly after you connect to a network. This issue might be fixed by updating your PS4 system software.
If your PS4 keeps losing connection to the Internet while playing a game, or if any other problems occur, powering off and restarting your console will solve the issue in most cases. Make sure to perform the following steps each time your PS4 loses connection and you want to reconnect to the Internet:
From now on, before updating your console software, back up your saved data and content first. To learn how to backup correctly, select (Settings) > [System] > [Backup and Restore].
For detailed troubleshooting steps, select (Settings) > [Initialization] > [Initialize PS4]. You can only run this feature when the latest system software is installed.
If your PS4 still cannot connect to a wireless network after performing these steps, you may need to update the system software. To learn how to update your PS4’s system software, select (Settings) > [System Software Update].
If your PS4 has not been automatically updated and you want to manually update the console software:
Use Web browser on a computer to go to http://update.playstation.net/ If you cannot use your computer, go to PlayStation®’s official website, and download the system software update file to your computer. Then save the file onto a USB storage device, and copy the saved file to the system storage of your PS4™ system to perform an update.
Set up a Static IP Address for PS4 for fixing the PS4 Wi-Fi disconnection issue
You can experience this problem if you connect your PS4 to the Wi-Fi network using a router that is connected to an Internet modem.
To fix the issue, you need to set up a Static IP for your PS4 and then select Use Static IP Address on your PlayStation 4 Settings menu. To do so, follow these steps: Step 1: Find out your PS4’s current IP address. To do so, follow these steps:
a) Press the [PS] button on the controller to open the Quick Menu.
b) Go to Settings and then select System Software Update. Wait until it says that “Your PlayStation4 is up to date” under System Software Update.
c) The IP address is displayed as “IP Address” or “IP Address:xxx.xxx.xxx.xxx”. If the last three numbers are 000, you need to set up a Static IP for your PS4 Step 2: Find out your Internet modem’s settings and get its WAN MAC address if there is one.
d) If you get the message “DNS Server Not Responding”, follow these steps:
1. Go to Settings > Network > Set Up Internet Connection.
2. Choose Custom for Select a connection method, and then select Do not use WAN settings. Then choose Next to move on to the next screen.
3. Select Via Ethernet, and then choose Next.
4. Select Do not use a proxy server. Then choose Next to move on to the next screen.
Rebuild Database on PS4 for fixing the PS4 Wi-Fi disconnection issue
The database rebuild on PS4 for fixing the Wi-Fi disconnection issues is not to be confused with the “Rebuild Database” option in the ‘Settings’ menu of your PS4, which clears out all your data on your PS4 so you can start fresh with all new data, but does not fix any other issues.
So if you’ve tried the “Rebuild Database” in settings and your Wi-Fi disconnection issue is still there, then you’ll need to perform what we call a “Soft Rebuild”, which means you don’t have to remove all of your data. This enables you to still use all your data and saves but fixes any issues that may be caused by corrupt or missing files.
The Rebuild Database on the PS4 is not performed through the ‘Rebuild Database’ option in the Settings menu of your PS4, it is actually a feature that comes built-in with the PlayStation Network service (PSN) software on the PS4, and is used to remove all corrupt or missing database files.
A “Soft Rebuild” is when you can still use your data and save it, but any issues with corruption or missing files will be fixed by performing a rebuild through the PSN (PlayStation Network) software application on your PlayStation 4. To do this soft rebuild before you start… Go to the PSN (PlayStation Network) store through the PlayStation 4 menu, login, and then scroll right till you get to ‘Settings’, then press X. Scroll down once more and select PlayStation Network, then press X. Now choose Account Management, once again press X and finally choose “Initialize PS4”.
Make sure that first when you try to connect your PS4 to the wi-fi network you have already done all the necessary preparations. Go into settings and update your IP address and DNS, make sure they are correct. Then go into the ‘Network Settings’ menu on your PS4, then select ‘Set Up Wireless Network’. Now enter in the SSID of your network you want to connect to and select ‘Next’. You’ll have to enter the security information (if it is password protected), then select ‘next’ and finally press X.
Finally, go into settings, and make sure under “Network” that w/fi is turned on. It should say “Connected”. If not, try toggling it off then back on. Enter your password and finally press X. Now you should be connected to the internet through the Wi-Fi network you wanted.


